
Thursday, 8 December 2016
Oil Paint on Glass - Potential & Limitations - General
For the special effects in our animation we have decided to do them with paint on glass to add to the hand painted aesthetic. Animating with oil paint on glass is much more time consuming than other types of animation but it has a very distinct and rewarding aesthetic which can really aid in telling the story. One of my favourite oil paint on glass animations is the rendition of the old man and the sea by Aleksandr Petrov, this is a beautiful animation which really makes use of the medium. Oil paint on glass practitioners usually will scrape off only a portion of the paint which needs to be changed as this is more efficient than painting the entire scene for every frame. The advantage of using oil paints over any other type of paint is that oil paints take a long time to dry which makes it idea to animate with because it can be changed and reapplied many times. The medium itself is alot more practical and organic than other mediums such as computer generated animation which is why we think it will be interesting to try and combine them in an animation.

Character and Narrative - Week 10 Summary
This week has mainly consisted of finishing the blog posts and getting all the work into order but we did also finish the paint on glass portion of the effects and finished compositing the animation on premier, this was a lot more time consuming task that i previously thought it would be as we had to mask the fire to fit into the scene and also added a glow to the fire which took me and Brenda a while to get it looking right and not too overpowering. Me and Brenda have both worked hard on this project and i really feel i have achieved a step in my storytelling abilities, working with Brenda has had a big influence on this. The aspect of this project i enjoyed the most was rigging the characters, working on this project made me realise this and i am going to pursue this area much further and try to learn as much as i can about it.
Character and Narritive - Study Task 4 - Doing DUIK
i didn't expect to like DUIK because I'm not a fan of 2d computer animation that much but when using DUIK i began to like it alot, this is most probably because of my interest and brief experience with 3d rigging in Maya. For this reason i also found it quite easy and very enjoyable to rig my character. I found that working with DUIK was just like a 2d version of rigging in maya. My character was a chicken character that i designed quickly by using reference images from google to help, when rigging my character i put too many joints in the feet and didn't want to put ik chains on them all so i just parented them in the suitable hierarchy to the foot joint. I only added controllers where i needed the character to be controlled from, this ended up being the head, each wing, ribcage, hips and each foot. This added enough functionality to make a simple animation with my character. I then parented joints together to create more of a skeleton structure and to connect the different parts of the character.


Character and Narrative - Study Task 3 - Puppet Master
I found the puppet pin tool in after effects easy to use, all i needed to do was to make sure my picture was a png so it was only an image of the parts i wanted to deform. Then i placed the puppet pin tools on the 2d mesh and set key frames on the puppet pins to animate them. I think this is a ok tool for after effects and definitely would be useful in some very basic instances but in most cases i think the puppet pin tool produces quite unrealistic deformations when used to fully animate a subject.
Sunday, 4 December 2016
Character and Narrative - Week 9 Summary
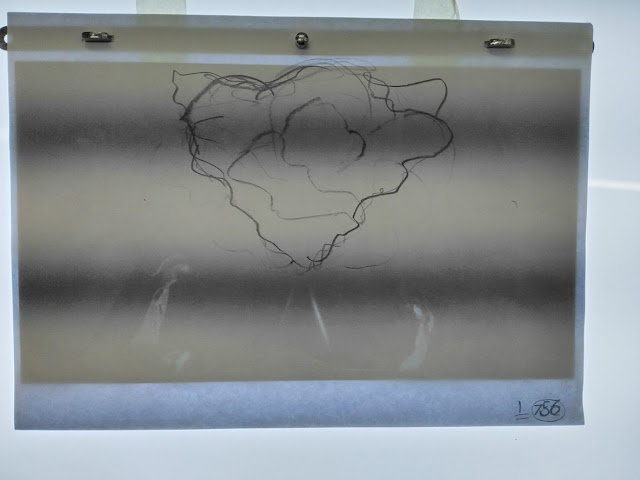
Since we both finished animating last week this week has been mostly rendering, we are rendering out in arnold because it has a good realistic lighting system which helps set the mood for our story. Besides rendering we also started working on the paint on glass effects such as the fire and the spirits. After a couple different linetests we decided on the best fire and painted it in the stop motion studio where we captured the frames with dragonframe. I like the aesthetic that has formed from the hand painted textures and the oil paint effects, i feel like the animation has a well structured aesthetic. I also began compositing the animation, masking the fire to blend in with the scene in premier and cleaning up the paint on glass frames in photoshop. We also made a last minute change to the animation, we added a shot before the previous first shot to help establish that Totsi is looking through the tent because otherwise it might not have been explicitly clear to the viewer. Also this week we booked the sound studio and recorded our sounds with the help of Max, it was very rewarding and really brought out the characters personalities when the sounds were composited with the animation.


CG - Potential & Limitations - Versatility
Computer generated animation is very versatile, it is used primarily in 3d animation, Movies and video games. CG is used extensively in each of these massive fields and this is a big advantage of learning CG animation skills because they are transferable to alot of different areas of the creative industry. I found a talk from Naughty Dog studios on the Autodesk youtube channel, it shows how they make realistic rigs for the characters and about how they use other programs such as mudbox to edit the corrective blendshapes. I think CG animation is more versatile than other mediums such as hand drawn or 2d computer animation because although both these mediums can be applied to the game aesthetic there is no real link to the scripting side of video games in the mediums themselves unlike CG. In addition CG has been used to simulate other more traditional mediums for example cut out animation for south park.
Character and Narrative - Week 8 Summary
This week we started animating, we found the Maya animating process really fast and easy. First of all we split the scenes so we each had an equal amount of scenes to animate, we also decided to use different maya scenes for each scene. This was to make Maya run faster and also incase a scene gets corrupted or errors occur at least its just one scene and not the whole animation. When animating i began by blocking out the key poses for the characters first, working on stepped tangents and then when the key poses were good enough i started animating the overlapping action which i found easier with smoothed out tangents. I really wanted to try and push the poses so when i was animating i had my sketchbook next to the keyboard and i would draw the poses very fluidly and try to achieve a heavily exaggerated pose to try and get the most out of the poses in Maya. Some scenes were harder than others to get organic movement so we recorded each other acting out the scenes for reference. for the more emotional, impacting scenes me and Brenda helped each other out alot trying to capture what the feelings actually feel like and how they can feel right visually. The rigs i created only had a few squash and stretch features but for the scene when Totsi enters the tent we needed a much higher level of deformation so i used a lattice to get the stretching that we needed to make the animation look pleasing.


Saturday, 3 December 2016
Character and Narrative - Week 7 Summary
This week wasn't that productive because of Manchester animation festival taking up the majority of the week but we still have our time managed. we were going to start animating at the end of this week but i needed extra time just to make sure the rigs are safe to give to the animation team (me and Brenda), i did this by checking all the controllers and locking and hiding the unused attributes to minimise potential mistakes and confusion for the animator. I also made sure everything was named correctly and put the meshes, skeleton and controllers into groups just to organise everything in the outliner and to make it abit easier if i need to correct rigging errors and mistakes during the animating stage.
Also this week i added the required functionality for the props, such as the tent door swinging open and closed and the windchimes swinging, i did this with blendshapes and used controllers with set driven keys. Due to some of the shots needing to be filmed from different angles i made a switch which toggles the tent to opposite sides, i also added switches to toggle the visibility of each character.


Also this week i added the required functionality for the props, such as the tent door swinging open and closed and the windchimes swinging, i did this with blendshapes and used controllers with set driven keys. Due to some of the shots needing to be filmed from different angles i made a switch which toggles the tent to opposite sides, i also added switches to toggle the visibility of each character.


Friday, 25 November 2016
CG - Potential & Limitations - Technique
In terms of character animation in CG, personally i don't think there
are any limitations because although you have the limitations of the
rig, there are squash and stretch rigs and even ways to break the rig
for certain scenes if it's needed. I do think that these things take
more consideration and problem solving than hand drawn animation for
example because in hand drawn animation there are no limitations at all
to what the character can do and all you need to do is draw the change.
This is a games animator show reel that i thought was amazing, it really shows the squash and stretch potential for rigging and the beauty of the timing and overlapping animation applied to computer animation.
This is a games animator show reel that i thought was amazing, it really shows the squash and stretch potential for rigging and the beauty of the timing and overlapping animation applied to computer animation.
CG - Potential & Limitations - Process
The process of computer animation can be very fast compared to traditional animation or it can be very slow and problematic. It all depends on the experience and skill of the modeler/rigger/animator. I find that the process of computer animation works in a sort of hierarchy, for example if the model is good and the topology is good then the texturing and rigging will be easier and if the rigging and skinning is done well then the animation stage will be alot easier than if the rig is unorganized and problematic. In terms of animating the scenes there is a common workflow used in which the animatic is is made first to get the idea of the action, then the layout is made which uses the low poly meshes of the characters and just very basic blocking, no secondary action at all. Then the final animation with all the secondary action and then the shot with the final lighting. This process is similar to more traditional mediums although traditional mediums have more steps in the process due to clean ups and colouring.
3d progression reel for 'Monsters University':
2d progression reel for 'Little Red Robot Hunter':
3d progression reel for 'Monsters University':
2d progression reel for 'Little Red Robot Hunter':
CG - Potential & Limitations - Aesthetics
Computer generated animation has a very defined and general aesthetic. There are some variation in computer generated aesthetics but i think there is much less variation than other mediums such as hand drawn. I think this is due to the influence of the big CG companies such as Pixar but I'm sure there are different aesthetics for 3d which have not yet been explored. This is something we are trying to do in our project by having a hand painted aesthetic in computer animation. Computer animation Varies from other mediums in animation in that it has almost an aesthetic capacity due to the constant software/hardware changes but these aesthetic changes aren't dramatic.
Pixar type aesthetics are the most thought of for computer animation but video games and special effects for movies have different aesthetics which often includes more realistic looking models and often a less saturated colour scheme.

Wednesday, 23 November 2016
Character and Narrative - Week 6 Summary
This week i finished tweaking the rigs because i kept needing to add changes and fixing bits of the rig that i was unaware was broken. For example when i tried to do a test animation on the rigs i wasnt able to set keyframes on the transform attributes of the controllers, this was because i had used set driven keys keyframes on the controllers and therefore could not have a keyframe set also. I got around this problem by setting set driven keys on the groups of the controllers rather than actually on the controllers. For example with the hand curl controller, The set driven keys are on the group of the controllers so that the controller still curls the hand when moved in the x axis but the fingers can also be controlled by the individual finger controllers and can have key frames set on them.
We also made a change in the story to have both of the characters summoning the spirits at the end instead of just totsi being able to do it because we think that's a better ending and will add a better moral influence to the story.
This week we also started painting the textures for the characters and the props once we had modelled the props and unwrapped them and the characters. If we painted straight onto the uv print outs some of the uvs might have shown through and therefore when scanned in would have been projected on the model, to get around this problem we used a lightbox and painted on a separate piece of paper above the uv print out.


Saturday, 19 November 2016
Character and Narrative - Week 5 Summary
This week I completed the rigs added blendshapes for facial deformations and set driven keys to drive the blendshapes visually. I also skinned the characters which was a lengthy process, it was definitely a challenge skinning both the clothing and the body to the skeleton because i had to make sure both meshes were skinned so that there was no overlapping even in extreme poses but still had to make sure it moved like clothing. I spent a while during the skinning process on the shaman for this reason, i made use of the component editor alot to see how the vertices were being influenced if they were not how i wanted them. I found totsi alot easier to skin because her coat, although having more components moves more uniformly to the body Although the tassels at the bottom of her coat didn't skin well so instead of spending hours skinning them i just created an alteration blendshape for them. Because I'm working with Brenda on this project and she doesn't have much knowledge of maya i have made the rigs as user friendly as i can by locking and hiding unused attributes, appropriately naming controllers and appropriately shaping and placing controllers. I feel like I've learnt alot from modelling and rigging these characters and i think having a good mindset is important in learning these skills or any skill in fact. For example if i had a problem, getting angry or discouraged isnt going to help anything but appreciating the problem as a way to learn the program/skill further is a much more healthy and productive way of learning new skills.


Sunday, 6 November 2016
Character and Narrative - Week 4 Summary
This week we had the group crit session which was helpful, one of the main issues was that the story was not clear in the animatic so Brenda is going to define the animatic further. we also have to think about how we are going to capture the textures into the computer because scanning them in might lose alot of quality. I began rigging my shaman character, i wanted the rig to use IK controls instead of FK controls like my last 3d character because IK controls are alot easier and nicer to animate with. I found making the IK joints relatively simple and i learnt about using clusters for the spine IK. At first i was going to try making a joint based facial rig and then i realised i might as well just make a blendshape driven facial rig as this is both easier to make and easier for the animator to control. I added aim constraints for the eyes and the head which i had to alter quite abit to make the head move realistically. I made the eyelids joint based instead of using blend shapes because blendshapes use a linear path to get from the original position of the vertices to the altered position of the vertices whereas joints rotate around a pivot point which suits the motion of the eyelids.


Character and Narrative - Week 3 Summary
Once i finished modelling the shaman character i unwrapped the model in the uv editor so that Brenda can paint the textures, i overlaid alot of the uv's to save space. Since me and Brenda have different skillsets we thought it would be more efficient and more professional to work to our skill sets. Therefore Brenda is working more on colour, set design and props and im working on modelling and rigging the characters. Although when the characters are rigged we will both be animating them. When i began modelling the Girl i duplicated the shaman mesh, resized it and deleted the head, this was alot faster than starting fresh. i was debating whether to put the tassels on the coat because it might be an inconvenience when it comes to rigging but if i don't try it then i wont learn anything. Because me and Brenda are doing different tasks it feels like i am working in an animation company, for example when Brenda handed me the character sheet and i modeled her character from that and then later on i'll hand her the rigs to animate. I also enjoyed modelling Brenda's character because it was quite a 2d suited design and a different design to my usual characters but i managed to adapt it for 3d and i think it works well. once i modeled both the characters i started thinking about ways to rig each character, there are multiple ways to rig a feature so i am working out the best way for each feature.


Sunday, 16 October 2016
Character and Narrative - Week 2 Summary
Over the past week we have solidified the story to a good standard, designed our characters further and i started to model the shaman character in Maya since i was happy with the designs. I have learnt a lot already from collaborating with another person, i have learnt that i should be more critical with my ideas and look at them with a level, unbiased opinion to see if they work. Another thing i think is very advantageous when working with others on a project is the fact that everyone's mind works differently and everyone's consciousness is greatly varied which means everyone interprets the world in different ways and therefore thinks about things in different ways and has different thought processes. This has an impact on the whole process of animation but especially idea generation and story development, if each person is open to other's ideas but also clear about what they like and dislike and egos are nonexistent i think its a really productive way to work.
Once i was confident with the designs for the shaman character i decided to start modelling the character in Maya straight away because i want as much time saved for solving problems as possible because i don't know how many problems we are going to have to face at the moment. The modelling process was fairly straight forward although i had to re-do my topology to make the character deform better. Whilst modelling certain tricky parts like the hands and feet, i played around with different ways of modelling them and different topology. When designing the colour scheme for the shaman i realised i knew very little about colour theory so i will need to study that before i go much further.


Once i was confident with the designs for the shaman character i decided to start modelling the character in Maya straight away because i want as much time saved for solving problems as possible because i don't know how many problems we are going to have to face at the moment. The modelling process was fairly straight forward although i had to re-do my topology to make the character deform better. Whilst modelling certain tricky parts like the hands and feet, i played around with different ways of modelling them and different topology. When designing the colour scheme for the shaman i realised i knew very little about colour theory so i will need to study that before i go much further.


Sunday, 9 October 2016
Character and Narrative - Week 1 summary
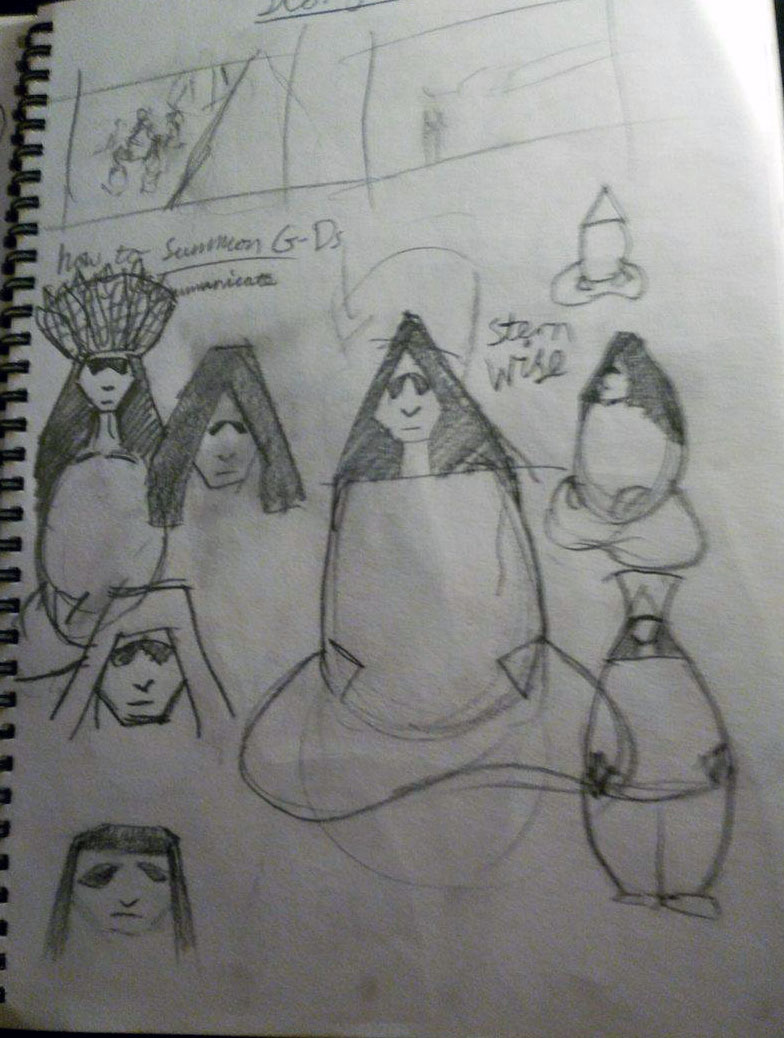
To start the project off we started working on some story ideas based on the starting themes, we chose to focus on the 'a message' theme and started thinking of rituals as a message to higher powers or spirits and narrowed it down to native American rituals, summoning spirits. We were thinking of either doing paint on glass animation or doing CGI in Maya, we decided on Maya because for character animation it is easier to get across the characters emotions and feelings accurately with Maya. We used a whiteboard to get down ideas for the story and the characters, I've been reading books on story development and character design over the past week because i feel like this is my weakest area.

 I think the story and characters are the most important stage of the animation process because its fine to have strong technical skills but if the story is boring and the characters are unimaginative and uninteresting then there isn't really much point in the animation. If the analogy of a tree is used, the story and the characters are the roots and the technical skills and post production are the branches. Since i am working in a team i have had to adapt to working with another person and splitting the workload which i haven't needed to do that much so i thought it would be good to try it out since it's good practice for working in the industry. Once we decided on the characters we each assigned ourselves a character to design, i am designing the Shaman which is the spiritual member of the tribe who can contact the spirits. I made sure to start simply and design the character in terms of basic shapes and i kept in mind that i would be modelling the character in Maya.


Friday, 6 May 2016
Modelling a truck in maya
I found modelling the truck quite helpful for learning the basic tools in maya when i first used it. I really enjoyed the process and made sure i understood everything i was doing. To light the truck i used a spotlight and a directional light, i used the directional light because the right wheel and the bit underneath was blacked out completely so i used the directional light to illuminate those areas slightly to make them visible.


Thursday, 5 May 2016
National Geographic Ident Progress (Maya) - Modeling a Frog
For my national geographic ident i decided to do it in maya because now that i am familiar with the tools and know what i am doing it will take much less time than any other medium. I also enjoy making animations in maya I'm not just doing it because it's quicker. I was quite stuck for what to do for the national geographic ident so i had a think and came up with the base idea of modelling a frog in maya and maybe making it croak and the camera could just pan out from the frog to get the logo in full shot. I thought the simplicity would match the mood of the channel.


Animating a Walk Cycle In Maya
For the animation skills study task we had to animate a pre rigged character in maya. I didn't find this too difficult because i had already become familiar with the animation tools in maya but i probably should have added more overlapping action onto the arms and subtle movements on the body to show the weight shifting. I added overlapping action onto the feet though and the controllers for the feet and legs made it very easy to do so.
Modelling a skull in maya
For my 'Do It Yourself' item i chose to model a skull because i wanted to challenge myself. It wasn't that difficult to model but it was hard to get the brow ridge right and i think i could have done the teeth a lot better. To rotate the skull as a whole i first had to parent all the teeth to their respective part of the skull and then parent the jaw bone to the main skull mesh so then everything moves and rotates together and not separately.


Subscribe to:
Comments (Atom)